A clogged filter is the number-one reason a Dyson vacuum loses suction. Most homeowners don’t realize that filter maintenance isn’t optional, it’s part of the machine’s basic operation. Dyson engineers built washable filters into their vacuums specifically so owners could maintain peak performance without buying replacements every few months. Ignoring filter cleaning leads to overheating, motor strain, and reduced airflow. The good news? Cleaning a Dyson filter takes about five minutes of active work and zero special tools. This guide covers identification, removal, proper washing technique, and drying, all the steps needed to restore full suction and extend the vacuum’s lifespan.
Table of Contents
ToggleKey Takeaways
- Clean your Dyson vacuum filter at least once per month to prevent suction loss of 30–50% and maintain peak motor performance without replacement costs.
- Dyson filters require cold water only—never use soap, detergent, or heat—and must dry completely for 24–48 hours before reinstalling to avoid motor damage.
- A clogged filter reduces indoor air quality and forces the motor to work harder, accelerating wear on internal components and triggering the filter indicator light.
- Identify your filter type by checking the label for ‘washable’ designation and consulting your manual, as certain HEPA cartridges are sealed units that cannot be washed.
- Properly cleaned Dyson filters last 10+ years and save $20–$60 per filter by eliminating the need for costly replacements throughout the vacuum’s lifespan.
- After cleaning, test the filter’s dryness by feeling inside the pleats before reinstalling, and run the vacuum for 30 seconds to confirm the filter light resets and no blockages exist.
Why Regular Filter Cleaning Is Essential for Your Dyson
Dyson vacuums use cyclonic separation to capture dirt, but filters catch the fine particles that escape the cyclone chamber, dust mites, pollen, dander, and microscopic debris. As these particles accumulate, they create a physical barrier that restricts airflow through the motor. Reduced airflow forces the motor to work harder, generating excess heat and drawing more amperage. Over time, this accelerates wear on internal components, particularly the brushless motor that drives the vacuum.
Most Dyson models trigger a filter indicator light when airflow drops below optimal levels, but many homeowners continue vacuuming past that warning. The result: suction drops by 30–50%, carpets get a superficial pass instead of a deep clean, and the vacuum starts emitting a musty odor as trapped moisture and organic matter break down inside the filter pleats.
Dyson recommends cleaning filters once per month under normal use. Homes with pets, high foot traffic, or indoor/outdoor transitions should clean every two weeks. The filters are designed to last the life of the vacuum, typically 10+ years, if washed correctly. Skipping maintenance voids that longevity advantage. No replacement filters are needed if the original is maintained, which saves $20–$60 per filter depending on the model.
Another often-overlooked benefit: a clean filter improves indoor air quality. Dyson markets many models as having HEPA filtration, meaning they capture 99.97% of particles 0.3 microns or larger. That rating only holds true when the filter has adequate airflow. A saturated filter becomes a reservoir for allergens, releasing them back into the room during use.
Identifying Your Dyson Filter Type
Dyson has used several filter designs across its product lines, and knowing which type the vacuum uses determines the cleaning approach. Most models have either one or two filters depending on whether they’re upright, canister, stick, or handheld.
Upright models (V7, V8, V10, V11, V15) typically have a single cylindrical post-motor filter located near the top or rear of the machine. It’s usually purple, blue, or gray and twists counterclockwise to remove. Some older uprights (DC series) have a pre-motor filter inside the ball housing as well, this one is often washable, but check the manual.
Canister models (Ball, Big Ball, Cinetic) may have both a pre-motor filter near the dust bin and a post-motor HEPA filter at the exhaust. The pre-motor filter is typically foam or pleated paper: the post-motor is a rigid HEPA cartridge. Only the pre-motor filter is washable on most canister models, HEPA cartridges are sealed units.
Stick and cordless models (V6, V7, V8, V10, V11, V12, V15) use a washable filter unit at the top of the cyclone assembly. It’s often bright purple or teal and has a twist-lock mechanism. The V15 and newer models may have an additional HEPA filter near the motor, which is also washable.
Handheld models (DC16, DC31, DC34, DC35) have a single filter inside the handle or near the dust bin. It’s usually a small cylindrical or conical unit.
To confirm filter type, check the label on the filter itself, it will say “washable” or “do not wash.” If unsure, consult the user manual or Dyson’s website, which has filter identification by model number. Washing a non-washable filter (such as a sealed HEPA cartridge on certain Ball models) destroys its structure and voids any warranty coverage. When in doubt, homeowners can reference resources like cleaning filter maintenance guides for model-specific instructions.
Step-by-Step Guide to Cleaning Your Dyson Filter
Removing the Filter Safely
Before starting, unplug the vacuum or remove the battery if it’s a cordless model. This isn’t just a safety precaution, it prevents accidental motor activation while hands are inside the machine.
For upright and stick models, locate the filter at the top or rear of the unit. Twist the filter counterclockwise (most models use a quarter-turn lock) and pull straight out. Some models have a release button instead of a twist mechanism, press and lift.
For canister models, open the top cover or access panel. The pre-motor filter is usually behind a latch or clip. Lift it straight out. If the model has a post-motor HEPA filter, it’s typically located at the exhaust vent. Check the manual before removing, some HEPA units are permanent and should not be washed.
Inspect the filter for visible damage: tears, warping, or a collapsed pleated structure. Minor discoloration is normal, but if the filter is cracked or the plastic frame is broken, it needs replacement.
While the filter is out, empty the dust bin completely and wipe down the cyclone assembly with a dry microfiber cloth. Dust buildup inside the cyclone reduces efficiency even if the filter is clean.
Washing and Rinsing Properly
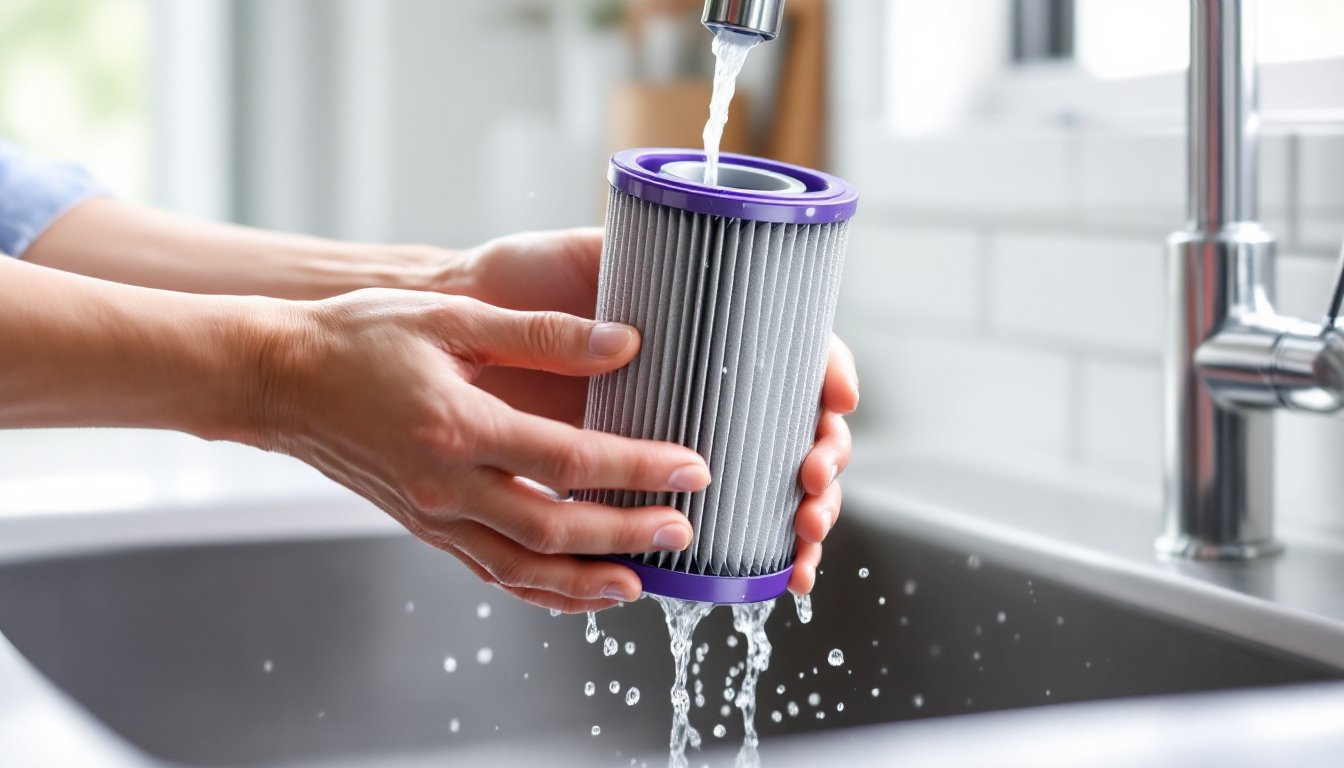
Dyson filters should be washed with cold tap water only, no soap, detergent, dishwasher, or washing machine. Detergents leave residue that clogs the filter media and can damage the electrostatic properties of HEPA filters.
Hold the filter under a running faucet with the dirty side facing up. Let water flow through the pleats from the inside out, flushing debris toward the exterior. Gently squeeze the filter while rinsing, don’t wring or twist it, as this can tear the pleats. Continue until the water runs clear. This usually takes 1–2 minutes.
For heavily soiled filters (common in homes with pets), soak the filter in cold water for 10–15 minutes first, then rinse. Don’t scrub with brushes or abrasive pads, this damages the filter material and reduces filtration efficiency.
Once rinsed, tap the filter gently against the sink to remove excess water. Don’t blow compressed air through it or use a hairdryer, heat warps the plastic housing and can melt synthetic filter media.
Many home maintenance routines include quarterly deep-cleaning of household appliances, and vacuum filter care fits naturally into that cadence.
Drying and Reinstalling Your Filter
This step is where most mistakes happen. Dyson filters must be completely dry before reinstalling, even slight dampness causes the motor to pull moisture into the electronics, leading to corrosion and failure.
Place the filter on a clean towel in a well-ventilated area, away from direct sunlight or heat sources. Position it upright (if cylindrical) or flat (if disc-shaped) so air circulates around all surfaces. Drying takes a minimum of 24 hours, but 48 hours is safer, especially in humid climates. In winter or high-humidity conditions, drying can take up to 72 hours.
To test dryness, feel inside the pleats with clean, dry hands. If any dampness or cool spots remain, wait another 12–24 hours. Running the vacuum with a damp filter triggers the motor overheating protection on most models, shutting the vacuum down mid-use.
Once fully dry, inspect the filter again for any residue or discoloration. A clean filter should be light gray or off-white. If it still looks dark brown or black, repeat the rinsing process.
Reinstall the filter by reversing the removal steps: insert it into the housing, twist clockwise (or press until it clicks), and ensure it’s seated flush. If the filter doesn’t lock in place, don’t force it, check the alignment and try again. A loose filter allows unfiltered air into the motor, defeating the purpose of cleaning.
Run the vacuum for 30 seconds as a test. Listen for unusual noises or check the filter indicator light. If the light stays on after reinstalling a clean, dry filter, the vacuum may have a blockage elsewhere, check the hose, wand, and brush bar for clogs. For additional appliance care tips, homeowners often consult home improvement resources that cover routine maintenance schedules.
Conclusion
Cleaning a Dyson filter is one of the simplest, highest-impact maintenance tasks a homeowner can perform. Monthly washing preserves suction, extends motor life, and maintains indoor air quality, all without spending a dollar on replacement parts. The key is patience during the drying phase: rushing that step causes more problems than skipping the cleaning altogether. Set a recurring reminder, whether digital or written on a wall calendar, to check the filter every four weeks. It takes less time than vacuuming a single room, and it keeps the Dyson running like new for a decade or more.