Winter doesn’t give warnings before it arrives with frozen pipes, ice dams, and heating failures. A few hours of preventive work now can save thousands in emergency repairs when temperatures drop below freezing. This checklist covers the critical maintenance tasks every homeowner should tackle before the season’s first hard freeze, from weatherproofing vulnerable pipes to ensuring heating systems won’t quit at 2 a.m. on the coldest night of the year. Most of these jobs require basic tools and a free weekend, though a few will need professional help.
Table of Contents
ToggleKey Takeaways
- Winter home maintenance tips include inspecting roofs and gutters, sealing drafts, and servicing heating systems to prevent costly emergency repairs when temperatures drop.
- Clean gutters and downspouts before winter to prevent ice dams that force water under shingles and cause interior water damage and leaks.
- Weatherstrip doors and windows, insulate attic spaces to R-38 to R-60, and seal basement rim joists to reduce energy waste and heating costs.
- Schedule professional HVAC tune-ups in early fall, replace furnace filters every 30 to 90 days, and test thermostats to ensure heating systems won’t fail during cold snaps.
- Insulate exposed pipes with foam sleeves and heat tape, disconnect garden hoses, and install frost-free sillcocks to prevent burst pipes and plumbing disasters.
- Test smoke and carbon monoxide detectors monthly, stock emergency supplies including flashlights, water, and blankets, and verify homeowner’s insurance covers winter damage like roof collapses and ice dam leaks.
Inspect and Protect Your Roof and Gutters
Start with a visual inspection from the ground using binoculars. Look for missing or damaged shingles, cracked flashing around chimneys and vents, and sagging sections that might indicate trapped moisture or structural issues. If the roof is accessible and you’re comfortable with ladder work, get closer to check for granule loss on asphalt shingles, bare spots mean the shingles are nearing end-of-life and won’t shed water properly.
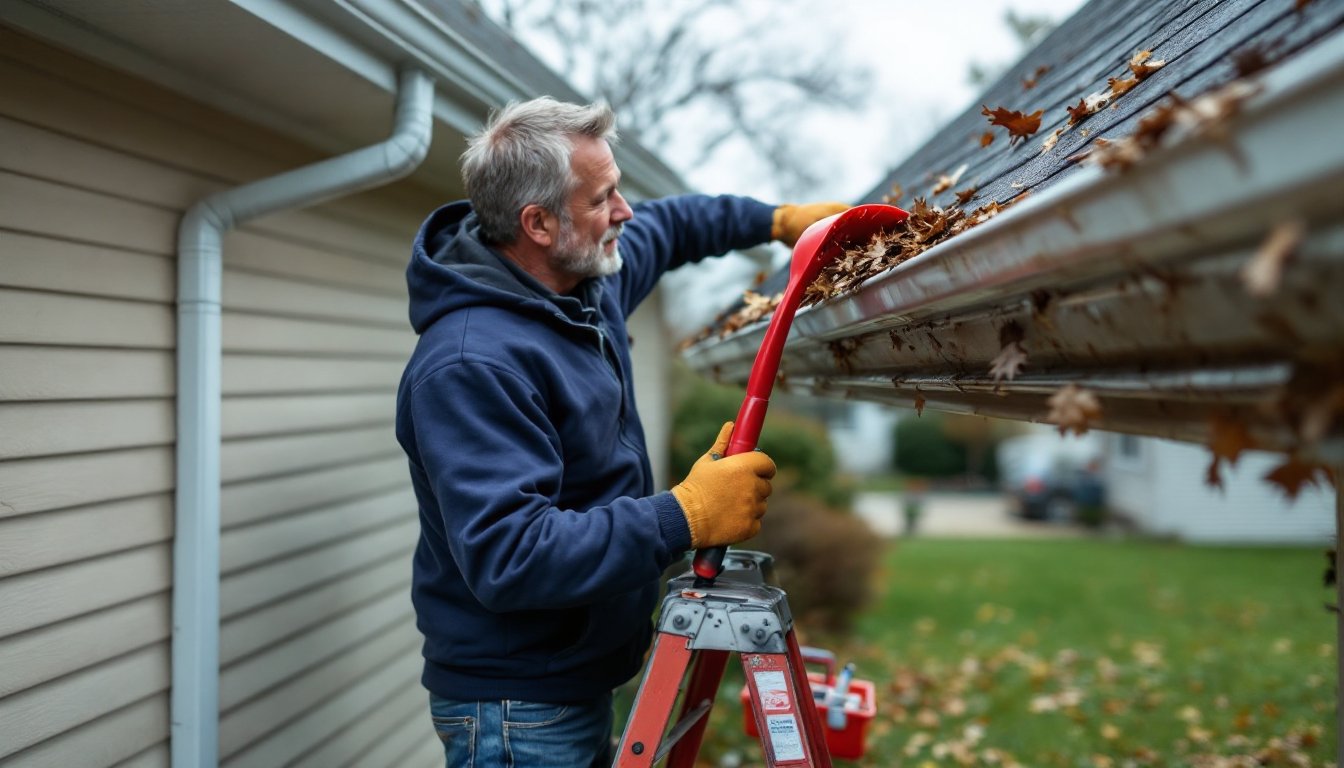
Clean gutters and downspouts completely. Packed leaves and debris create ice dams when snowmelt can’t drain. Ice dams force water under shingles, leading to leaks and interior damage. Use a gutter scoop or garden trowel to remove debris, then flush with a hose to confirm downspouts flow freely. Extension ladders should be placed on firm, level ground at a 4:1 ratio (one foot out for every four feet up). Wear gloves, decomposed leaves are slippery and often hide sharp objects.
Consider installing gutter guards if you’re tired of twice-yearly cleanings, but know they’re not maintenance-free. Even mesh guards need occasional clearing. For homes in heavy snow areas, roof heat cables along the eaves can prevent ice dams, though they add to your electric bill. If your roof is older than 15 years or shows significant wear, schedule a professional inspection before winter weather arrives.
Seal Drafts and Insulate Your Home
Air leaks waste more energy than poor insulation. On a windy day, hold a lit incense stick near window frames, door thresholds, electrical outlets, and baseboards. Smoke that moves sideways reveals drafts. Common culprits include gaps around exterior doors, window sash edges, attic hatches, and penetrations where pipes or wires enter the home.
Weatherstripping comes in several types: adhesive-backed foam for door jambs, V-strip for double-hung windows, and door sweeps for bottom gaps. Foam is cheap and easy but compresses over time. V-strip lasts longer and seals tighter but requires careful installation. Apply weatherstripping when temperatures are above 50°F so adhesives bond properly.
For gaps wider than ¼ inch, use paintable acrylic latex caulk indoors and exterior-grade silicone or polyurethane outdoors. Don’t caulk the bottom edge of exterior window trim, it’s a designed weep path for trapped moisture. In the attic, check that insulation covers the ceiling joists completely and hasn’t been compressed. The recommended R-value varies by climate zone, R-38 to R-60 for most northern regions. Add loose-fill cellulose or fiberglass batts if you’re below code minimum. Insulating your attic floor is far more effective than sealing air leaks in walls, though both matter.
Basement rim joists, where the foundation meets the wood framing, are notorious heat thieves. Seal them with rigid foam board cut to fit between joists, then caulk the edges. Wear a dust mask when working with fiberglass insulation and gloves to avoid skin irritation.
Service Your Heating System Before the Cold Hits
Furnaces and boilers work hard all winter. Schedule a professional tune-up in early fall, technicians get slammed once temperatures drop, and you don’t want to wait three days for service during a cold snap. A qualified HVAC tech will inspect the heat exchanger for cracks (a carbon monoxide hazard), test the ignition system, measure airflow, and clean burner assemblies.
Homeowners can handle basic maintenance between professional visits. Replace furnace filters every 30 to 90 days depending on filter type and household conditions (pets and dust increase frequency). A clogged filter reduces efficiency by up to 15% and forces the blower motor to work harder. Standard 1-inch fiberglass filters cost a couple bucks and need monthly changes: pleated MERV 8-11 filters trap more particles and last three months. Don’t jump to MERV 13+ without checking your system, dense filters can restrict airflow in older furnaces not designed for them.
For systems with accessible blower compartments, vacuum dust from the blower motor and fan blades. Keep vents and registers clear, furniture and rugs blocking airflow waste energy and create uneven heating. If you have a boiler, check the pressure gauge. Most residential systems run between 12 and 15 psi when cold. Low pressure means the system may need water added, though recurring low pressure indicates a leak that needs professional attention.
Test the thermostat by raising the set temperature a few degrees and listening for the system to kick on. Programmable or smart thermostats can cut heating bills by 10-15% with scheduled setbacks, but only if you use them correctly. An 8-hour overnight setback of 7-10°F saves energy without risking frozen pipes. Buildings that rely on radiant heat or heat pumps often benefit less from setbacks due to longer recovery times.
Prevent Frozen Pipes and Plumbing Disasters
Frozen pipes burst when ice expands, creating pressure that splits copper, PEX, or galvanized steel. A single burst can dump hundreds of gallons before you notice. Pipes most at risk include exterior wall lines, unheated crawl spaces, garages, and attics. Insulate them with foam pipe sleeves rated for the pipe diameter, ½-inch and ¾-inch copper are most common in residential plumbing. Slit foam tubes slip over pipes and are secured with duct tape. For extra protection in severe climates, wrap pipes with heat tape (also called heat cable) before adding insulation.
Disconnect and drain garden hoses. Shut off interior shut-off valves to exterior hose bibs, then open the outdoor faucet to drain residual water. If there’s no interior shutoff, install frost-free sillcocks, they have a long stem that closes inside the heated space, preventing freeze-ups. These cost $15-$40 and thread into a standard ½-inch connection.
For pipes that have frozen in the past, leave cabinet doors open under sinks on exterior walls to let warm air circulate. During extreme cold events, let faucets drip slightly, moving water is harder to freeze. A pencil-lead-width stream is enough. This wastes a bit of water but is far cheaper than repairing burst pipes and water damage.
Drain and winterize irrigation systems if you haven’t already. Blow out lines with an air compressor (most systems need 40-80 psi) or hire a landscaping service. Water left in sprinkler valves and underground lines will freeze and crack components. If your home has a sump pump, test it by pouring a bucket of water into the pit. The float should rise and trigger the pump. A backup battery system is worth considering if your basement floods easily, power outages and heavy snowmelt often coincide.
Prepare Your Exterior and Landscaping
Walk the perimeter of your home and check foundation grading. Soil should slope away from the house at least 6 inches over 10 feet to direct water away from the foundation. Low spots that pond water in spring can cause basement leaks or foundation movement. Fill with compactable soil or clay, not mulch.
Trim branches that overhang the roof or come within 6 feet of the house. Ice and wind load can snap limbs, damaging shingles, gutters, or windows. Use a pole saw for high branches rather than climbing a ladder with a chainsaw, one’s a DIY job, the other’s a trip to the ER. For large trees or anything near power lines, call an arborist.
Power equipment needs winterizing. Drain fuel from lawnmowers, trimmers, and pressure washers, or add fuel stabilizer and run the engine for a few minutes to circulate it. Old gas gums up carburetors. Change oil in four-stroke engines, clean or replace air filters, and store tools in a dry space. Resources like Family Handyman offer detailed seasonal maintenance guides for outdoor power tools.
Move clay pots indoors, they crack when wet soil freezes and expands. Store or cover patio furniture, grills, and other outdoor items. Protecting your home during extreme cold often includes securing or storing anything that can be damaged by snow load or ice.
Check exterior caulking around windows, doors, and siding joints. Cracks let water in, which freezes, expands, and makes the damage worse. Scrape out old, failing caulk and reapply with a caulk gun. Exterior-grade products cure in temps as low as 35°F, but check the label.
Check Safety Systems and Emergency Supplies
Test smoke detectors and carbon monoxide alarms monthly by pressing the test button. Replace batteries in battery-powered units or once a year in hardwired units with battery backup. CO detectors should be installed on every level of the home, particularly near sleeping areas. Furnaces, water heaters, and any fuel-burning appliances produce carbon monoxide if they malfunction. Detectors have a limited lifespan, usually 5 to 7 years, so check the manufacture date on the back.
Inspect fire extinguishers. Residential units should be rated ABC (suitable for wood, electrical, and grease fires). Check the pressure gauge, the needle should be in the green zone. If it’s low or the unit is older than 10 years, replace it. Keep one in the kitchen, one near the furnace, and one in the garage.
Stock emergency supplies in case of winter power outages. Essentials include flashlights, batteries, a battery-powered or hand-crank radio, bottled water (one gallon per person per day for at least three days), non-perishable food, blankets, and a first-aid kit. Keep a bag of sand, salt, or kitty litter in the garage for ice traction on walkways. A backup heating source like a portable propane heater or wood stove can be lifesaving, but never use outdoor-only heaters indoors, they produce deadly CO levels. Vent any fuel-burning backup heat properly.
Review your homeowner’s insurance policy. Confirm coverage limits for water damage, roof collapses from snow load, and ice dam-related leaks. Some policies exclude certain winter damage unless preventive maintenance is documented. Even a well-maintained home isn’t immune to winter disasters, but addressing the basics in a January home maintenance checklist can reduce risk significantly.
Conclusion
Winter maintenance isn’t optional, it’s the difference between a warm, dry home and a costly emergency repair. Work through this checklist in stages rather than trying to tackle everything in one weekend. For furnace maintenance and other heating system tasks, call a pro. The rest can be handled with basic tools and a methodical approach.